Fawn

Pages

Wednesday, September 26, 2012

Elegant Witches

I know it's not quite October yet, but I just couldn't wait to post a Halloween project!
I used papers from the Attic Treasures and 5th Avenue lines from Melissa Frances. I wanted to turn these cute silhouettes from Jenni Bowlin into elegant witches for a fun Halloween gift bag and wall hang.  


I used scraps of paper to make little hats for these lovely ladies and added a feather and a dab of glitter to them. I then embellished the gift bag and wall hang with seam binding and brooches. 


Supplies used:
Gift Bag- pattern paper, rhinestone brooch from Melissa Frances
Silhouette- Jenni Bowlin
seam binding

Wall Hang-
seam binding


Thursday, September 20, 2012

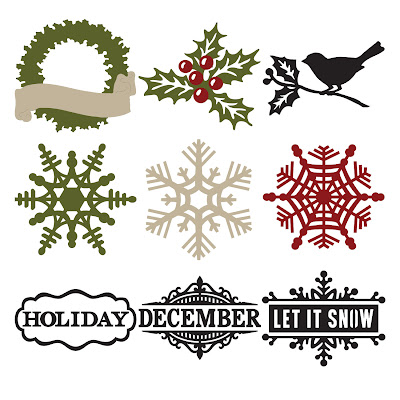
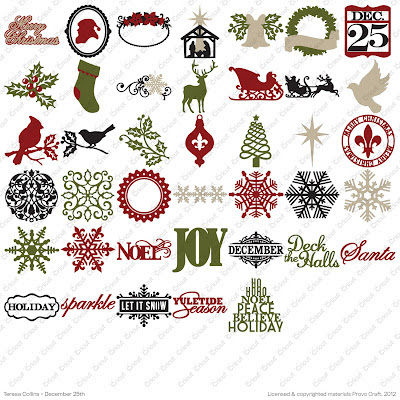
Debuting Teresa Collins- Provo Craft Cartridge

Debuting the newest Teresa Collins Provo Craft Cartridge "December 25"! 
So many beautiful designs! 
Want to win one for yourself?  Check out  the Teresa Collins Blog to find out how! 


Friday, September 14, 2012

Washi Tape Covered Candle and Pomander

Happy Friday!

  Autumn is by far my favorite time of  year and it's definitely in the air. The leaves are changing into their vibrant oranges, reds and yellows and the mornings are starting to get chilly.  I thought I'd share a couple  fall home decor projects  today using the gorgeous Vintage Finds collection to get you in the mood for autumn!  (Don't kill me if you're hating to see summer end!)


 The first is a washi tape covered candle. I used a battery operated candle because I'm sure using washi tape on real candle wouldn't go over too well with melting wax. Simply take your  tape and wrap it around the candle. I sprayed the top of the candle with spray adhesive and sprinkled a little glitter on it until the top was completely covered.


I then painted a candlestick and let it dry. Black tulle was wrapped around the candlestick, tied into a bow and embellished with a pennant sticker and medallion. Glue the candle on top of the candlestick using E6000 and let dry.


For the pomander, I used my good ol' Cricut basic flower shape (you could also use a flower punch) and cut out several flowers using two different patterns of the Vintage Finds collection. Pin the flowers onto the styrofoam ball using pearl tipped pins and repeat until the ball is covered. 


Spray the candlestick with spray adhesive, cover it with glitter and shake off the excess. Tie a strip of tulle around the candlestick and embellish with chipboard buttons, a brad, pennant sticker, and a medallion. Glue the styrofoam ball to the top of the candlestick and let dry.


And there you have it! Fun and simple projects for an elegant and impressive display.
Thanks for stopping by and have a creative weekend!

Supplies: Vintage Finds; Pattern Paper: Titles, Music;  Stickers;  Medallions; Brads; Washi Tape; Chipboard Elements.
Craft Supplies- Candlesticks, tulle, glitter, styrofoam ball, flameless candle, pearl tipped pins.




Thursday, August 30, 2012

Happy Birthday, Melissa Frances!


Make a wish, Melissa!
Happy 50th Birthday to a strong, hilarious, generous, creative, kind and beautiful woman. I am so blessed to know you and to be a part of the Melissa Frances family. I hope you have an incredible day and are spoiled rotten! Thank you for being such an inspiration to me and so many others. Here’s to another 50 years!


Be sure to head  over to the Melissa Frances Blog for your chance to win a goodie box filled with Melissa Frances products worth $100 and a one year subscription to Scrapbook and Cards Today

Supplies used:
c'est la vie border banner  - (turned upside down to make a crown)
vintage cupcake girl lisasalteredart.com
font-circus
mason jar
candlestick 


Saturday, August 25, 2012

Mini Butterfly Gift Boxes


I'm always on the lookout for fun and unique ways of presenting gifts to loved ones. Mini paper mache gift boxes are perfect to adorn with your favorite Teresa Collins embellishments and papers.  How fun would these be to fill with little surprises for your lucky recipient?!
These mini gift boxes were fairly quick and simple to make. First, trace the lid and base of the boxes onto pattern paper and cut out. Adhere the paper to the box and let dry. Glue border strips around the top and bottom of the boxes. 
Using the beautiful butterfly layered stickers, faceted rhinestones and a  banner die cut from the accessories sheet, I embellished the top of the box. For the round box, I pierced two small holes in the top  and inserted floral wire to make a bough. I attached butterfly stickers onto the wire and decorated the front of the box using medallions, chipboard elements and a ticket stub from a border strip.


For the final box, I placed a bit of tissue garland to the top and attached a medallion. I then added a paper flower and a layered butterfly sticker. 
These mini creations were so fun to make! I'm sure whoever receives one, will love what's on the outside just as much as what's on the inside.

Thanks for stopping by and have a wonderful day!

Supplies: Tell Your Story;  Paper: Diamonds, Damask, Cards, Butterfly, Scalloped; Border Strips; Medallions; Layered Stickers; Accessories Sheet; Sticker 2; Paper Flowers; Faceted Rhinestones


Monday, August 20, 2012

Romantic Paper Fan

This romantic and feminine fan uses a mix of papers and cardstock stickers from the Melissa Frances  5th Avenue line and C'est La Vie collection. Both lines are great to mix and match with! The silk ribbon and pearl brooch are the perfect embellishments to tie it all together.


Supplies used-
Fan template- found here
Pearl Brooch - Melissa Frances
2 Layer Silk Ribbon Pink/Peach- Melissa Frances
Tea Party Applique Set- Melissa Frances
Zipper Ribbon- Melissa Frances
Ephemera Stickers- Melissa Frances

Thursday, August 9, 2012

Classic Paper Hats

Do you remember making paper hats as a kid? Here's a fun twist on the classic paper hat you made in grade school.  With a touch of whimsy and elegance, you can create these fun hats for any occasion. The beauty of this simple craft lies in its versatility.  How fun would these be as a centerpiece for a birthday party or bridal shower?! You could also use papers from the Teresa Collins Christmas Cottage collection and make some fun holiday party hats.


 I haven't made this style of hat since I was a kid, so I had to refresh my memory on how to make one. I simply googled "how to make a paper hat" and several tutorials popped up. I used one sheet from the Vintage Finds collection and one sheet from Tell Your Story. I love how papers from two different lines complement each other so beautifully. After I made the basic hat, the fun really began! I made paper feathers   by folding a small scraps of paper in half and cutting them into a half oval. I kept the paper folded in half and cut slits all the way down the "feathers". I then embellished the hat with a glitter border,  feathers, medallion, sticker and tissue garland around the edge of the hat. 

Here's another hat using chipboard elements, butterfly stickers and medallions from the Tell Your Story collection. 

Supplies used-
1 sheet Vintage Finds paper (cut down to 8.5x11)
1 sheet Tell Your Story paper (cut down to 8.5 x 11)
Layered Stickers
Accessories Sheet
Border Strips
Medallions 
Tissue Garland
Adhesive- Xyron Mega Runner


Thanks for stopping by and have a creative day!