Fawn: April 2018

Pages

Thursday, April 26, 2018

Teacher Appreciation Gift Idea

Hi friends!

Teacher Appreciation week is right around the corner and if you're looking for a sweet idea to give to all those fabulous teachers, you're going to love this idea! It's quick, easy and inexpensive but the teachers will love it. 

The talented Charynn of Pineapple Paper Co. designed some adorable cookie tags to pair with a delicious cookie! Who wouldn't LOVE that?

Check out the other darling cookie gift tags and ideas over at Everyday Party Magazine and Pineapple Paper Co.

If you're local to Salt Lake City, Ruby Snap has the perfect little cookie boxes with the most delicious cookies that your teachers will love!

Download the adorable and FREE cookie printables HERE

teacher appreciation ideas

teacher appreciation ideas

Thanks for stopping by!

Wednesday, April 25, 2018

New Children's Art at Minted

This post contains affiliate links and I will be compensated if you make a purchase after clicking on my links. I was compensated for this post. 


 Have you seen all the beautiful new children's wall art at MintedWhether you're decorating a nursery for the new baby or refreshing a big kid's room, Minted has art for every style and budget.

Our daughter is constantly wanting to change up her room and with these charming prints, it's easy to swap out colors and patterns for her ever changing mind. She's REALLY loving that colorful palm tree print right now and I have to say, it's one of my favorites too!

 If you're looking for a unique gift idea, these sweet framed art pieces would also make delightful shower gifts for the parents-to-be.


Minted has the most adorable nursery art that will change your baby's nursery into a magical wonderland . From snugly bears to colorful flowers, you're bound to find that perfect print that will tie the entire nursery together beautifully.


This space theme is out of this world and I'm pretty positive it would be a huge hit with any cosmos loving kid! You can select different colors and patterns of frames and choose the size of print that works best for you. The possibilities are endless!

Lets not let kids have all the fun! These gorgeous Minted fine art prints  will brighten up any room and can turn ho-hum bare walls into a stunning gallery wall.


From the nursery to the office and everything inbetween,  Minted has beautiful fine art to adorn every wall in your home.

Tuesday, April 17, 2018

Ladybug Picnic


 This review is based strictly on my opinion. I was provided the sample free of charge by Oriental Trading to provide my honest review. No other type of compensation was received. All ideas and opinions are my own.

This post contains affiliate links.

                       Ladybug Picnic

My friend's little girl recently turned 1 and I was thrilled when she asked if I could help her come up with some fun ideas for a ladybug picnic party.

Oriental Trading has so many adorable ladybug supplies to help you throw the ultimate ladybug picnic party.


Here's what you'll need to put together a fun-filled ladybug party!
The invitations were placed inside mini picnic baskets and handed out to the guests. Who wouldn't love to receive an invite inside a picnic basket? Too cute!

I used my  Cricut Explore Air 2  to cut out these sweet ladybug invitations. All the details of the party were printed on white cardstock, cut out and placed on top of the body of the ladybug. The wings are attached towards the top with a tiny brad so that they're able to open and close.


Echo Park Paper- Good Day Sunshine was the perfect paper line to create these sweet boxed lunches for the little guests. I cut the boxes out using my Cricut, filled them with kid-approved food  and then tied them with red bakers twine and tucked in plastic utensils.


Of course I had to add a few of those adorable adhesive ladybugs to the boxes! 

Ladybug Picnic

It's not a party unless party hats are involved! I used my  Cricut machine cut out the darling hats in no time and I added a bit of white tissue to the top and a few ladybugs to the front of the hats.
Ladybug Picnic

Ladybug Picnic

Ladybug Picnic

Bug Juice aka lemonade was a big hit at the picnic with these glass milk bottlesFor added cuteness, attach adhesive ladybugs to the bottles and tie polkadot straws with bakers twine to the bottles as well. 
Ladybug Picnic

Ladybug Picnic


During the picnic, the kids were given little favor boxes with ladybug bubbles placed inside. They had a blast blowing their bubbles and running around with their ladybug pinwheels. It was the perfect spring activity and kept the kids engaged for a long time! 
Ladybug Picnic


After the picnic, the guests enjoyed yummy birthday cake using this adorable Ladybug Party Pack. Ladybug plates, cups and napkins greeted the little guests as they gobbled down all that delicious birthday cake.
Ladybug Picnic

Ladybug Picnic

As the party came to a close, the guests were given these sweet  little ladybug favor pails filled with cute favors like jump ropesladybug notepads and mini ladybug beach balls

Ladybug Picnic


The kids had a wonderful time and loved this sweet ladybug picnic. It was the perfect party to usher in spring and to welcome all those happy, tiny ladybugs!

Thanks so much for stopping by!

Vintage Circus Candy Table with Oriental Trading FUN365

Disclosure: As a member of the Oriental Trading Fun Squad, I received compensation and/or products in exchange for my styling and crafting services.
This post contains affiliate links.


Step right up to this fun and whimsical vintage circus candy table! Check out all the details on Oriental Trading's FUN365 site HERE. 

You'll find the free printables from Invited by Audriana and all the supplies you'll need to recreate your very own vintage circus candy table. Your wedding guests will love this unique and fun-loving take on your big day! 


Wednesday, April 4, 2018

Patterned Iron-On Ideas with Cricut

This is a sponsored conversation written by me on behalf of Cricut. The opinions and text are all mine. This post contains affiliate links.

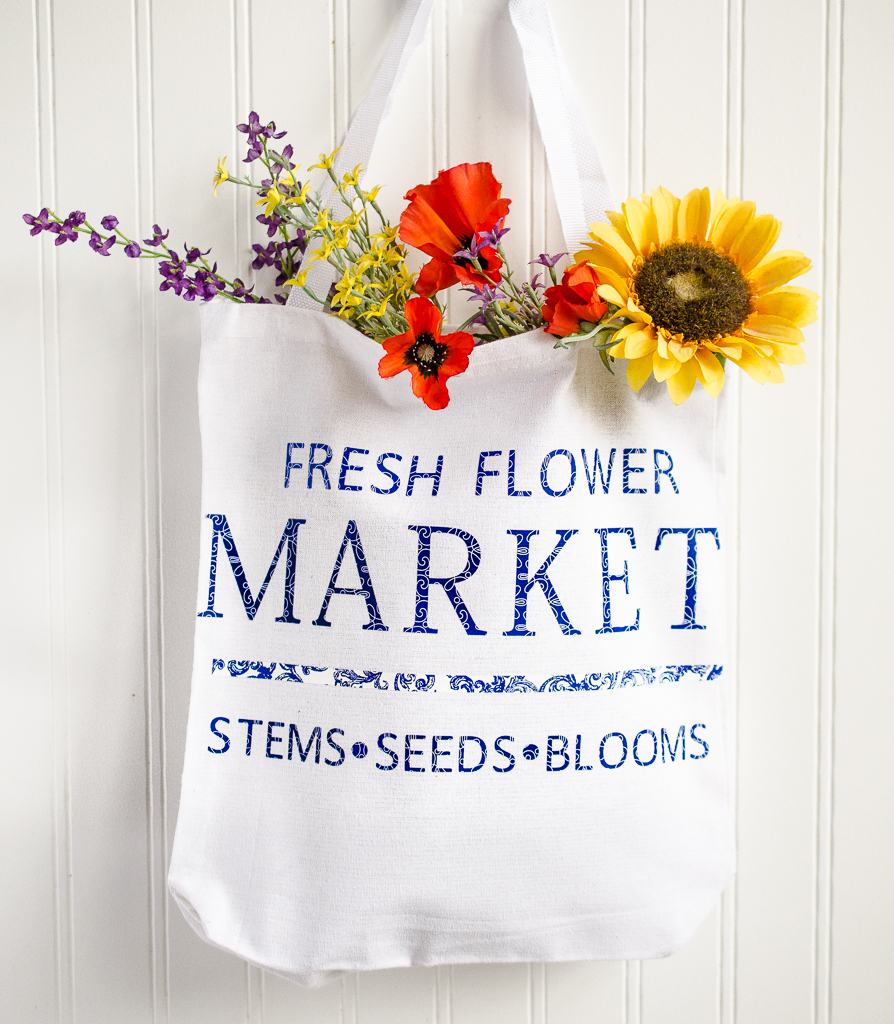
With summer just around the corner, all those wonderful farmers markets will be in full swing. This darling reusable bag is just what you need to carry all those goodies home from the market in. With the new PATTERNED IRON-ON, you can add a beautiful touch of colors and patterns to your bag. 

The new Patterned Iron-On is so much fun to play with! I've been mixing and matching colors and patterns and having a blast coming up with different ideas. You're going to love all the amazing creations you can make with the gorgeous patterns. There are 9 sampler packs and each pack comes with 3 -12"x17" sheets.  Check out all the beautiful new Cricut Patterned Iron-On HERE. 

For this project, I used the gorgeous new Filigree Blue Patterned Iron-On Sampler and loved how it turned out. 
These bags are quick and easy to make so let's get started!

What you'll need:


Open the  FRESH FLOWER MARKET design in  CRICUT DESIGN SPACE


Make sure to click on "mirror" and place your Patterned Iron-On sheet color/pattern sign down on the mat. 
Next turn the dial to the iron-on setting and click "Make It".  The Cricut Explore will then cut out the image.  


After the image has been cut, weed the image using the CRICUT WEEDING TOOL SET. Weeding your iron-on goes so much faster and easier with a weeding tool! 

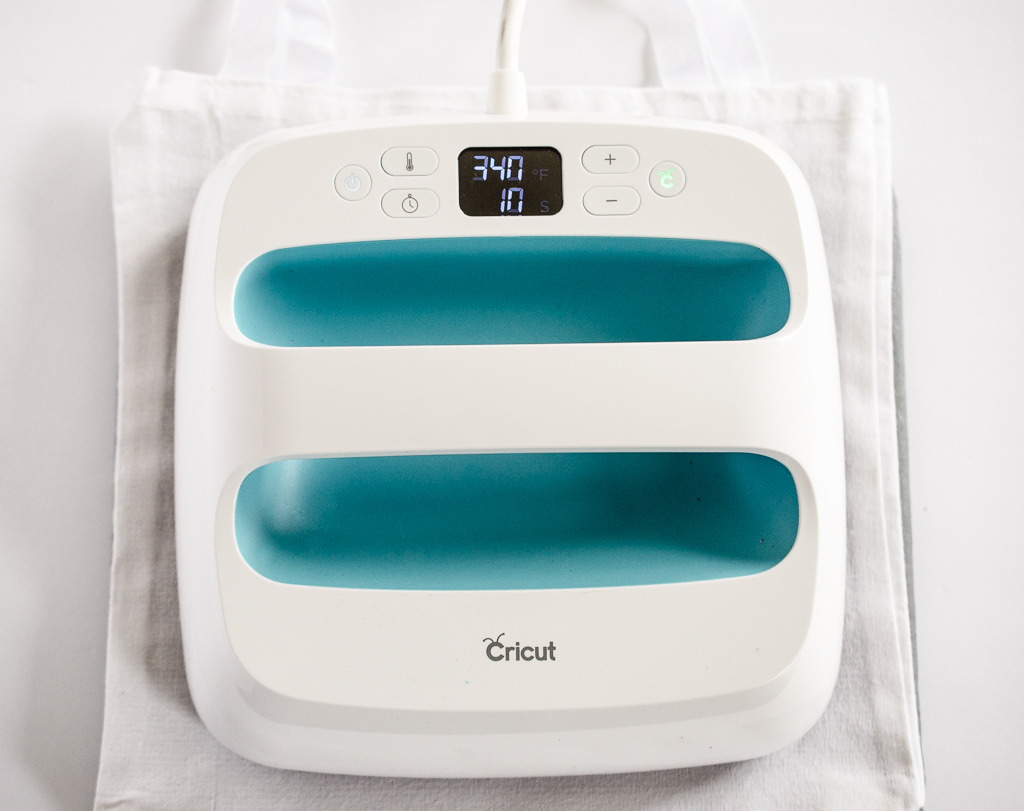
After you have weeded the iron-on image, set it aside and begin heating up the EasyPress. Place the tote on top of the EasyPress Mat. Set the temperature to 340 degrees and preheat the area of the bag you'll be placing the image on using the EasyPress. Do this for 5-10 seconds. The bag I used is 12 3/4" x 3" x 12 3/4" with an 8 handle. The design will take up most of the space. If you would like it a little smaller, simply edit the image in Cricut Design Space to make it smaller.  

Next, place your cut image on top of the preheated material. 

Set the EasyPress to 340 and apply on top of the cut image for 50 seconds. Don't peel the image off just yet.

Flip the bag over and apply the EasyPress for another 15 seconds on the back of the bag.

Once the image has cooled completely, peel off the backing sheet.

And there you have it! You're ready to go to the market and gather all those fresh blooms and delicious produce. 


Here's another design you could also add to your reusable tote. Open up Farmers Market in Cricut Design Space and follow the directions from the previous Flower Market Tote. For this tote, I mixed and matched patterns from the Cricut® In Bloom Pink Patterned Iron-On Sampler  and the Cricut Natalie Malan® Sunset Blossom Patterned Iron-On Sampler
So cute, right? 


And with Mother's Day coming up just next month, why not tell your mom how you really feel about her with this adorable Best. Mom. Ever. tote! I mixed and matched colors and  patterns using the Cricut® Natalie Malan® Sunset Blossom Patterned Iron-On Sampler as well as the beautiful floral pattern from Cricut® Anna Griffin® Francesca Patterned Iron-On Sampler.

 Open up BEST MOM EVER cut file in Cricut Design Space and follow the previous directions.
Your mom will adore it!


Here's a sweet idea to give to a new mama! Matching Mama Bear and Baby Bear T-shirt and onesie using pretty floral iron-on patterns from Cricut® In Bloom Pink Patterned Iron-On Sampler.


What you'll need:


T-shirt and onesie

Using your Cricut machine, cut out the Mama Bear and Baby Bear image. Remember to click on "mirror" and place the iron-on pattern side down on the mat. 
Weed the image and set aside. 


Place the EasyPress Mat down on a hard surface and place the T-shirt on top of it. Preheat the material using the EasyPress at 340 for about 5-10 seconds. 

Center the cut image on the T-shirt and place the EasyPress over the image for 50 seconds at 340 degrees. 

Flip the T-shirt over and apply the EasyPress for another 15 seconds. Use a cold peel when you're peeling off the backing paper from the image. 

Now your sweet gifts for mommy and baby are ready to go! 

 I hope you have as much fun as I did creating with the new Cricut Patterned Iron-on! 
Thanks for stopping by!


This is a sponsored conversation written by me on behalf of Cricut. The opinions and text are all mine.