Fawn: May 2017

Pages

Monday, May 22, 2017

Vintage Baby Shower with Cricut


Welcome to the Party Blog Hop with Cricut! I'm sure you've been loving all the fabulous inspiration throughout the hop. I know I certainly have! I'm  madly in love with my Cricut machine and I'm constantly discovering new and amazing projects to make. 
Check out my vintage baby shower below to see all the fun projects I made with my Cricut and Cricut Design Space. The possibilities are truly endless with this machine!

For the vintage baby shower, I used the Oh Darling Collection by Crate Paper. I loved the mix of vintage florals and patterns in this collection and knew it would be perfect for the baby shower.

 Every cake needs a bunting, am I right? The soft pinks and pretty flowers made a beautiful bunting for this cake. I loved how it turned out!


Here's another shot of the bunting. Don't you just love those pretty scallops?! 

Instead of using cupcakes for the shower, I opted for tiny brownie bites just to change things up a bit. I loved the sweet cupcake wrappers and little flag toppers that I made using my Cricut. 


How cute are these mini popcorn boxes? Instead of using a plate or cake stand, I found a vintage baby book from the 1950s to place the popcorn boxes on. 


I cut out some bottle wraps and dressed up these sweet vintage inspired milk bottles. You can't have your bottles naked....oh, the horror!


No matter what the occasion, guests need a party hat. Using the party hat template on my Cricut, I cut out the hats, fastened them together with adhesive and attached a little white festooning to the top of each hat. Aren't they adorable?! 


As a thank you for coming to the shower, the guests received these sweet goodie cones filled with lip balm, mini lotions and treats. I'm all about quick and simple projects and these are no exception. You can find the tutorial on how to make these cute favors HERE. 


Thanks so much for stopping by!


I was invited to participate in the Cricut Party Blogger Program Kickoff.
This experience is based strictly on my opinion.  Others may have a different opinion or experience with the product listed above.  I was provided the sample free of charge by the company or PR agency and I have given my honest opinion.
This is a sponsored conversation written by me on behalf of Cricut. The opinions and text are all mine.


Vintage Baby Shower with Cricut- Favor Tutorial

As a thank you for coming to the shower, the guests received these sweet goodie cones filled with lip balm, mini lotions and treats. I'm all about quick and simple projects and these are no exception. You can find the tutorial on how to make these below. 


 Search for "cone" in the Cricut Design Space. Once you have your desired design, decided on the size you need. The cones I made were about 10" long and 9".


Place the paper into your machine, and press go! Once it's cut, take the paper off the mat and roll it into a cone shape. Fasten with adhesive. 
And that's it! 
Adorable and sweet little goodie cones your guests will love.


To make these mini popcorn boxes, simply search in the Cricut Design Space for "boxes" and choose your desired template. Once you've chosen your design, insert it and place it into your dimensions. Then insert the paper into the machine and press go!


After the machine has scored and cut the box, follow the template to fold it into a box. Use glue to adhere the edges together. It doesn't get much easier than that!


I hope you enjoyed my vintage baby shower and are having a blast blog hopping with Cricut!
Thanks so much for stopping by!

I was invited to participate in the Cricut Party Blogger Program Kickoff.
This experience is based strictly on my opinion.  Others may have a different opinion or experience with the product listed above.  I was provided the sample free of charge by the company or PR agency and I have given my honest opinion.
This is a sponsored conversation written by me on behalf of Cricut. The opinions and text are all mine.

Monday, May 15, 2017

Retro Bridal Brunch with Cricut


I'm so excited to be a part of the Party With Cricut Blog Hop! You will find so many ideas and inspiration throughout this awesome hop..

I have to say, I honestly don't know how I lived so long without my Cricut Machine. I'm completely obsessed and I want to cut ALL THE THINGS! If you've been on the fence about purchasing one, do it. Do it now. Your life will never be the same. *all the heart eyes in the world*


Let's get this party started!
Today I'd love to share my Retro Bridal Brunch using several cute images and projects from Cricut Design Space

Pancakes are a must for brunch and I wanted to dress them up a bit with a bright and colorful banner. I had my Cricut machine cut out the banner and then I added a bit of glue on the sticks and adhered them to the back of the banner. I love how it turned out!

Using the Cricut Design Space, I cut out these darling cupcake wrappers and pennant toppers. For my projects I used the Happiness is Homemade collection by Echo Park. The bright and cheery colors reminded me of my Grandma's kitchen and  I knew they'd work perfectly for this brunch. 


 I don't care how old you are, you will always receive a goodie bag at my parties!  I used my Cricut machine to cut out these little favor bags for the guests and added fun retro images from Authentique's Saucy Collection. 


I had way too much fun with the printable vinyl and wanted to stick them on everything! I limited myself to just a few things, like these cute milk bottles and plates. 

The guests loved dining on these adorable retro inspired plates. 


How fun is this adorable apron as a gift for the bride to be?! It can be made in just a few easy steps. Check out the tutorial HERE.

I was invited to participate in the Cricut Party Blogger Program Kickoff.
This experience is based strictly on my opinion.  Others may have a different opinion or experience with the product listed above.  I was provided the sample free of charge by the company or PR agency and I have given my honest opinion.
This is a sponsored conversation written by me on behalf of Cricut. The opinions and text are all mine.

Retro Bridal Brunch with Cricut- Apron and Plate Tutorial

How fun is this adorable apron as a gift for the bride to be?! It can be made in just a few easy steps. Check out the tutorial below!


For this project, I used printable iron-on light and used the Print Then Cut feature on Cricut Design Space. I loved the retro breakfast images from Cricut Imagine Art Kate's Kitchen and knew they'd be perfect for this party. 

You'll love how quick and easy this project is, so let's get started!
I set the canvas to apron so I could tell exactly how big the image was going to be on the apron. 


Next, the Cricut automatically sends it to your printer to be printed. 


After the image has been printed on the iron-on paper, take the paper out of your printer and place it in the machine to be cut. After the image has been cut,  follow instructions on package on how to apply to fabric. 
This was such a fun and easy project and I know the bride-to-be will love it! 


The plates were super simple to make as well. Here's how to make them:
Insert the image you'd like to have on your plate. I used Kate's Kitchen again for this project because those retro images are just too cute!
 I set the canvas to plate and positioned my image right where I wanted it on the plate. Then I sent the image to my printer and printed it out on printable vinyl. 
I then placed the vinyl in the Cricut and cut it out. 
For the last step, simply peel off the backing of the vinyl and place image on plate. So quick and easy!


I hope you enjoyed this retro bridal brunch and have fun hopping to all the fun parties!

I was invited to participate in the Cricut Party Blogger Program Kickoff.
This experience is based strictly on my opinion.  Others may have a different opinion or experience with the product listed above.  I was provided the sample free of charge by the company or PR agency and I have given my honest opinion.
This is a sponsored conversation written by me on behalf of Cricut. The opinions and text are all mine.

Woodland Fairies at Gardner Village

The world is full of magic things, patiently waiting for our senses to grow sharper. - W. B. Yeats
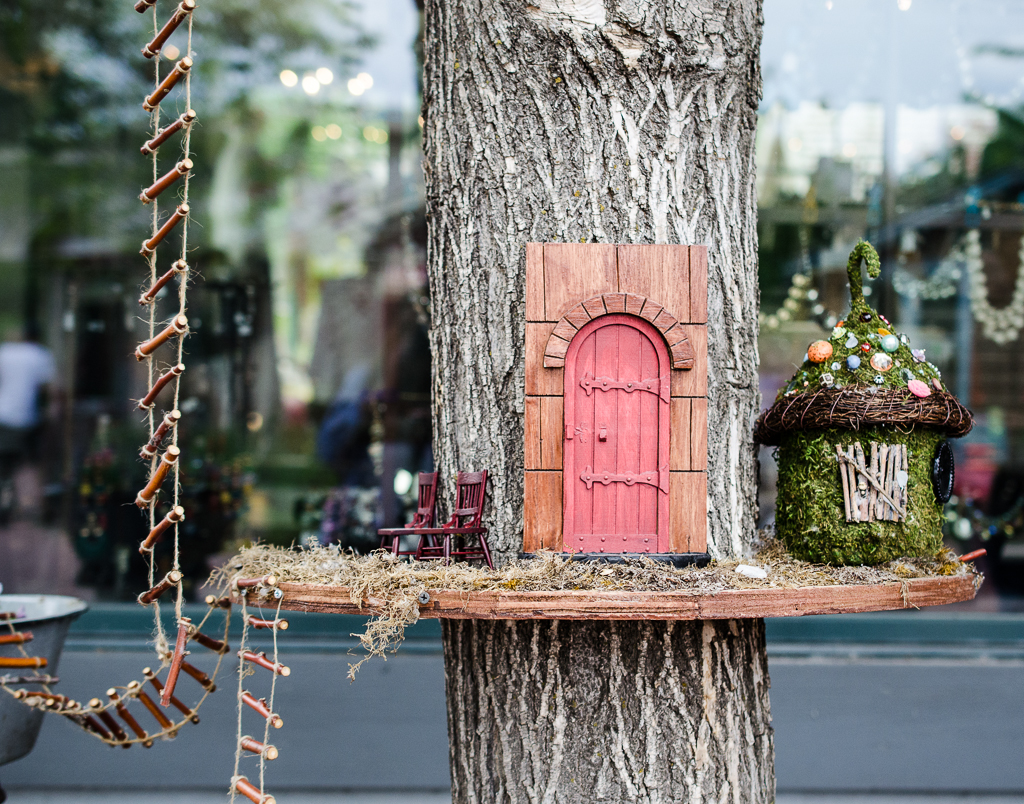
Do you believe in fairies? We most certainly do after spending an enchanting Saturday afternoon at Gardner Village. All throughout the village are tiny fairy houses and their enchanted residents just waiting for you to discover them.

My sister and I took our girls to the village to see if we could spot any mini magical friends. We are true believers in these woodland wonders, especially since the girls caught glimpses of the fairies winking at them! I just adore the magic of childhood.

Everywhere you look, there are enchanting fairies beside their tiny houses. If you listen closely, you can hear their little voices singing their sweet fairy songs....at least that's what our little ones explained to us. 

We spotted fairies having tea, fairies catching their beauty rest, fairies standing atop their fairy fortress and fairies playing musical instruments. The girls loved being a part of this tiny, magical world.


One of the girls' favorite activities was the A-Z Mystical Fairy Quest. There are 26 fairies in tiny jars throughout the village with each fairy representing a letter from the alphabet. We loved this adventure of trying to find all the fairies. The girls especially enjoyed all the silly faces the fairies were making inside their little jars.


Once we finished the fairy quest, it was on to the shops to enjoy all the activities the village has to offer.
Our first stop was 
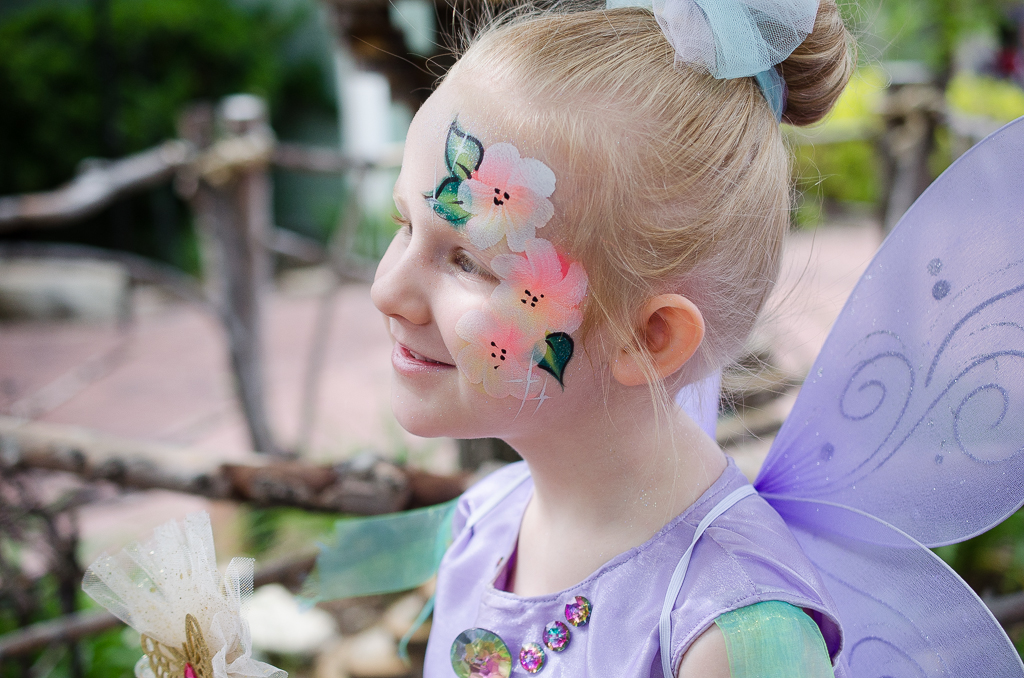
SPOILED ROTTEN CHILDREN'S CLOTHING BOUTIQUE for a pair of fairy wings so the girls could take flight. They each picked out their favorite color of wings and off they flew!


Our next stop was M SOAPS BY MARGUERITE for magical fairy bath bombs. These bombs are super fizzy and smell so heavenly. There's even a hidden surprise inside!

A quick stop to see if we could find any fairies that were hiding. We know fairies can be very shy so the girls waited patiently to see if any would come out from behind the flowers.

Face painting is a must while visiting the fairies. The girls requested sparkly daisies to adorn their little faces and a wonderfully talented fairy was more than happy to oblige.


After a delicious bite to eat at THE NABORHOOD BAKERY, the girls wanted to relax by the pond to see if they could spot any water fairies as well as feed the ducks.

They are pretty sure they saw some water fairies flitter and flutter by.

Our next top was the magical Wishing Bridge. The girls picked up their ribbon inside Aunt Elsie's Trinkets and Treasures and made their way to the bridge.

Once inside, the girls gave their ribbon a little kiss, made a wish and tied their bows alongside all the other wishing ribbons.


AUNT ELSIE'S TRINKETS AND TREASURES has fairy garden classes every Saturday so be sure to reserve your spot to make one of these darling fairy homes!


The girls looked high and low and found so many enchanting little friends. They especially loved the fairy playing the harp. So sweet!


Every Saturday at 1:00 pm from now until June 24th is a magical fairy parade complete with a beautiful unicorn! The girls were in awe as they pet and snuggled this enchanting creature. 

What could be more magical than a fairy riding a unicorn?! I think all the girls' dreams came true that day. They were giddy with excitement as they rode away on the sweet unicorn.


As we were getting ready for the parade to begin, beautiful woodland fairies appeared and gave out sparkly fairy kisses to the little ones. 


The fairies paraded throughout the village with their wands in tow and fluttering their wings. They danced, sang and played games as they skipped along the parade route.


After the parade was over, we headed to the THE BEAD FARM for the girls to make their very own fairy bracelet. They turned out adorable and the girls loved the "special fairy powers" the charms gave them.


GEORGELL DOLL SHOP was our last stop and the girls were thrilled to be able to peek inside the many beautiful homes and palaces of the fairies. They were also able to color their own fairy wings while inside the shop as well as pick up an adorable sheet of fairy paper dolls!


It  was a magically beautiful day and we are already counting down the days until we go again! 
Discover more enchanting fairy activities at Gardner Village HERE. Experience the magic of the Woodland Fairies now through June 24th. Be sure not to miss the Fairy Parade every Saturday at 1:00pm. Your kids will love riding a magical unicorn and skipping in the parade!

Thank you so much to Gardner Village, Georgell Doll Shop, Spoiled Rotten Children's Boutique and M Soaps by Marguerite for being so incredibly generous! The girls made memories that will last a lifetime.

Thank you!